Dyeing and designing eggs is a tradition for many families during the month of Easter. This year, Easter happens to fall very late. Easter will be celebrated on the 20th of April on a Sunday as always. So, now is the time to prepare and get your Easter egg dyeing materials ready!
Before I talk about different egg dyeing methods, let’s talk about why eggs are linked to Easter. Eggs represent new life and rebirth and it’s thought that this ancient belief became a part of Easter celebrations. During medieval times, eggs were not allowed to be eaten during Lent. So, once Easter Sunday rolled around, eating an egg was a real treat!
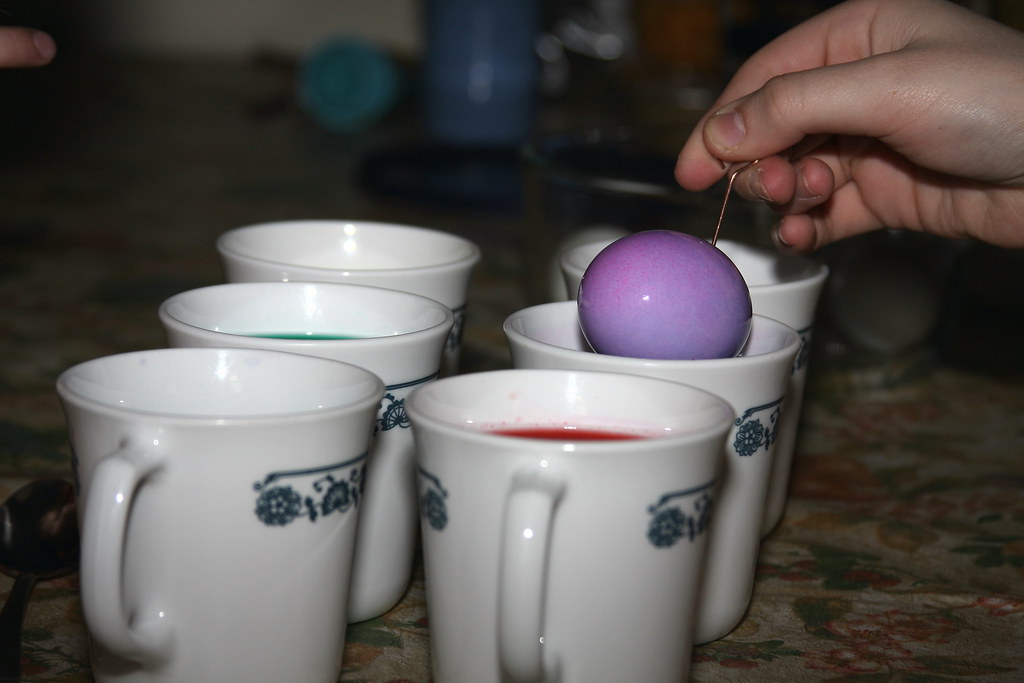
First things first, the most simple materials to start off with are and that are needed for every design is…
- Hard-boiled eggs
- Food coloring
- Vinegar
- Water
- Containers for the dye baths
For each dye bath, combine ½ cup boiling water with 1 tsp vinegar and 10 drops of food coloring in a bowl. Whatever color you want to create, make sure however many drops you add of each different color adds up to June. For example, 5 drops of red and 5 drops of yellow will get your orange. Dunk the egg in the dye bath for 3-5 minutes. The longer you let your egg soak in the dye bath, the darker it gets.
Now for the fun designs… (Pictures of the eggs are displayed at the bottom of this post!)
Write-On Easter Eggs
This is the most simple design yet. Before you dunk your egg in a container of dye, use a white or light colored crayon to draw, write, whatever you want on the egg.
Tie-Dye Shaving Cream Easter Eggs
- Fill a shallow glass dish with a thick layer of shaving cream. Make sure the shaving cream covers the bottom of the glass along with an inch of shaving cream.
- Add generous drops of food coloring on your layer of food coloring. Design it however you would like. Make sure you add a lotttt of drops! Take a toothpick and drag it through the food coloring to swirl and marble the colors.
- Roll your eggs through this concoction until the egg is layered in colorful shaving cream.
- Let your egg dry on a paper towel for 20 minutes. Don’t wipe off any shaving cream during these 20 minutes! Once it has been 20 minutes, you can then wipe off the shaving cream.
- Lastly, to really remove the excess shaving cream, dunk the egg in a bowl of water. To dry it, pat down the egg with a paper towel gently.
Rice Dyed Speckled Easter Eggs
- Fill up a cup/container with dry rice, ¾ of the way full.
- Add 10-15 drops of the food dye directly into the rice.
- Take the rice and egg and dump it into a plastic baggy. Close the ziploc baggie and shake the egg and rice in it.
- Lastly, take the egg out of the baggy and leave it to dry for 15-20 minutes.
Metallic-Sponged Eggs
- Take egg dye, gold paint, and mix it up. (Basically just pour some gold paint in a dye bath then stir it around.)
- Pour a little rubber cement and dab a sponge in it. Take that sponge then dab the egg with it. Leave the egg to dry for 10 minutes. 3.
- Take your rubbered egg and dunk it in your dye bath with gold paint.
- Lastly, remove the egg from the dye bath and while it is still warm, gently rub off the rubber cement with a paper towel.
Glitter Easter Eggs
- Dunk your egg in your dye bath, very plain and simple. Let this dry for about 10-15 minutes
- Mix glue and glitter then take a paintbrush and paint it on your egg.
- Lastly, leave it to dry. Don’t worry the glue will dry clear!
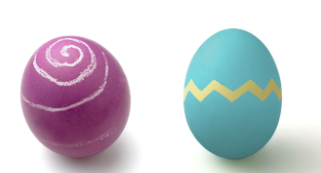
Write-On Easter Eggs (McCormick) 
Tie-Dye Shaving Cream Easter Eggs
(Brie Passano)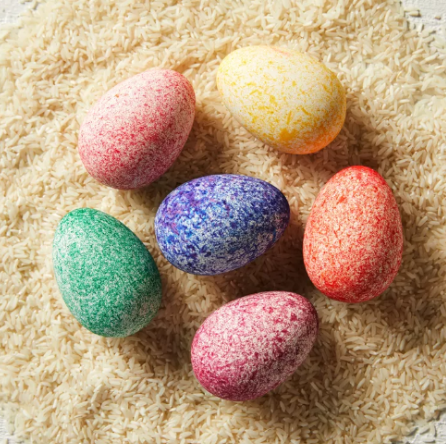
Rice Dyed Speckled Easter Eggs
(Jacob Fox)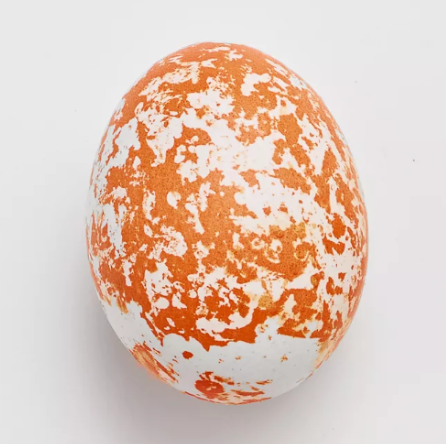
Metallic-Sponged Eggs
(David Prince)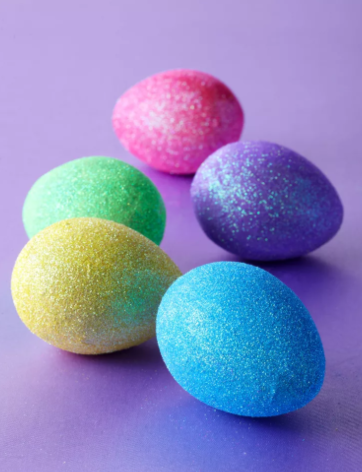
Glitter Easter Eggs (Blaine Moats)